Catalog
1. Adding an Approval Workflow
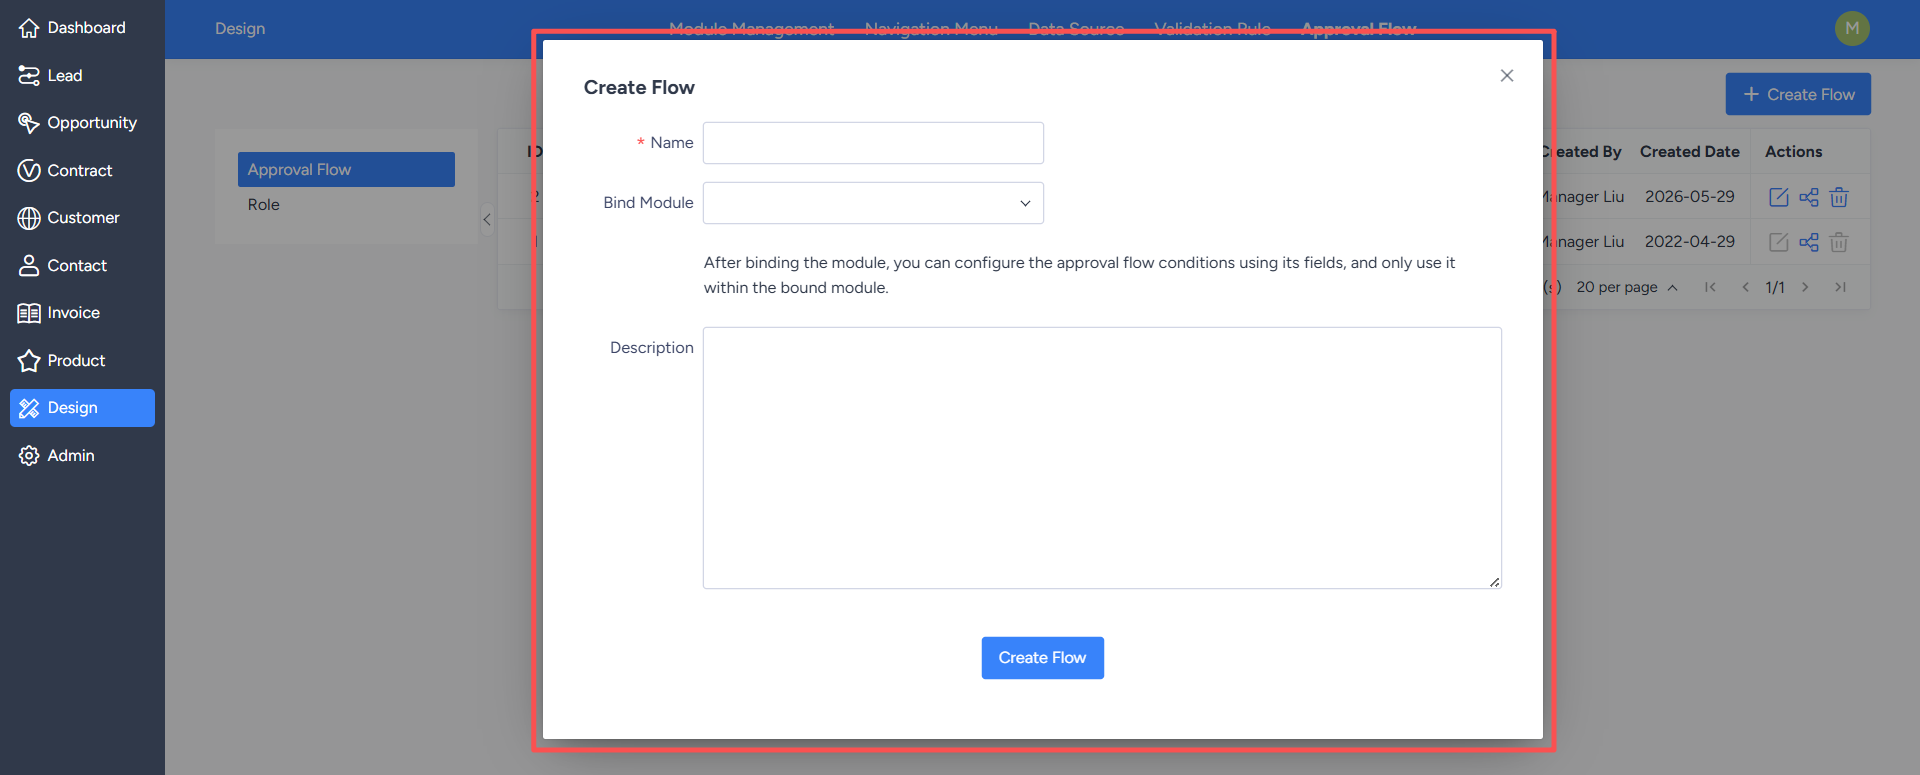
After entering the approval page, designers can click the "Create Approval Workflow" button to add a new approval workflow, or edit an existing workflow using the operation buttons on the right side of the approval workflow list.When creating an approval workflow, the following information is required:
- Approval Workflow Name: Used to identify the current approval workflow; a clear business name is recommended.
- Bound Module: Used to distinguish the scope of application of the approval workflow.
- Description Information: Used to describe the purpose, applicable scenarios, or approval rules of this approval workflow.

2. Designing an Approval Workflow
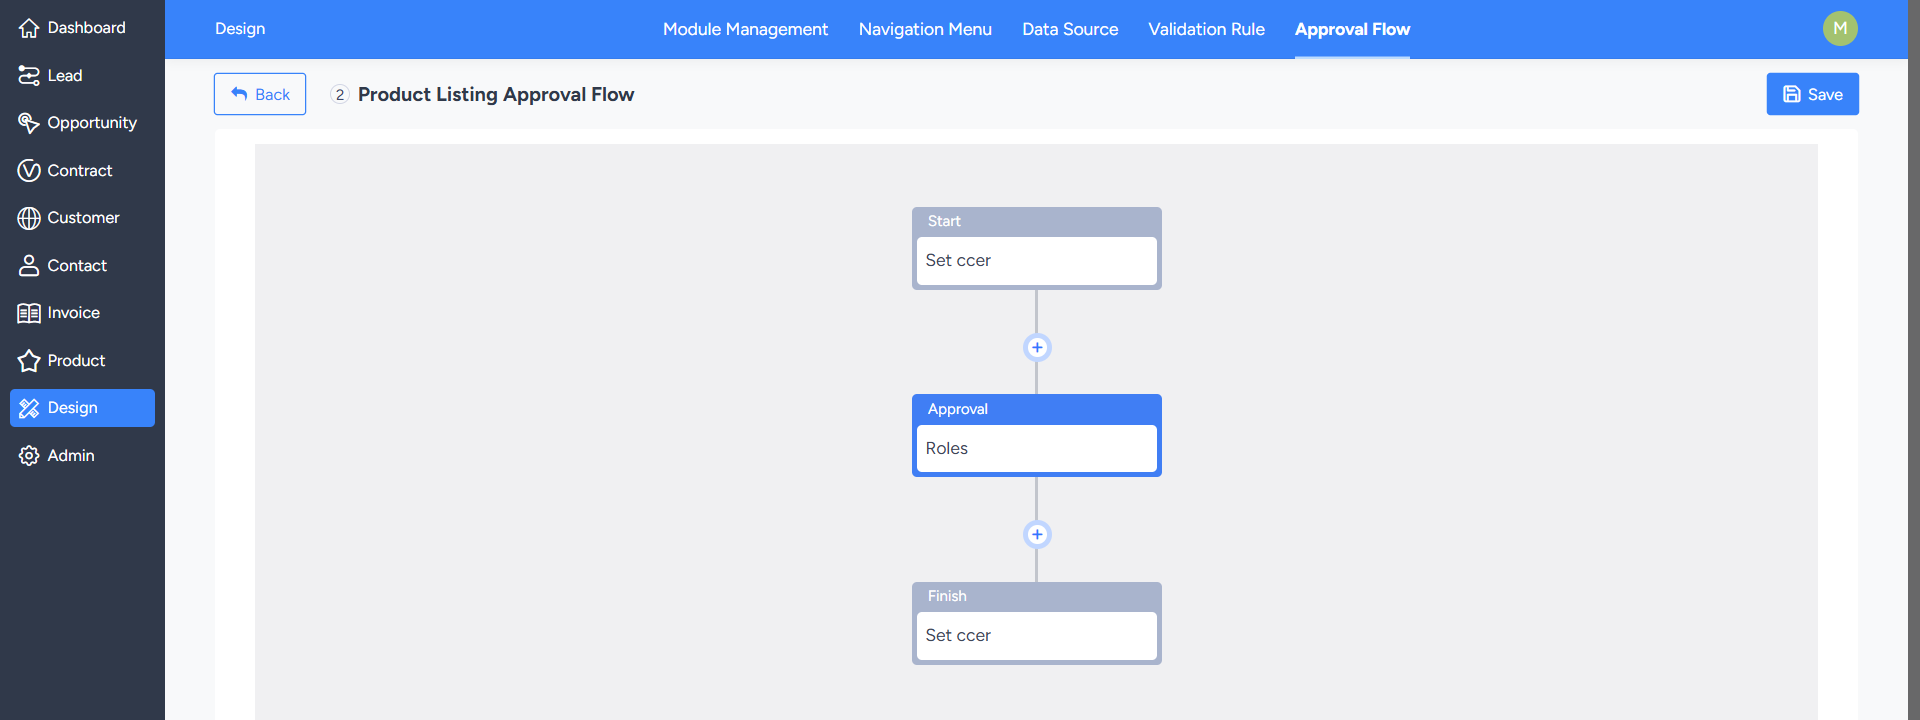
Clicking the "Design Workflow" button on the right side of the approval workflow list will take you to the approval workflow design page.Newly created approval workflows contain three nodes by default: Initiation, Approval, and End.
Designers can click on each approval node to configure node information, approvers, copy recipients, approval permissions, and workflow rules.

2.1 Copy Node Configuration
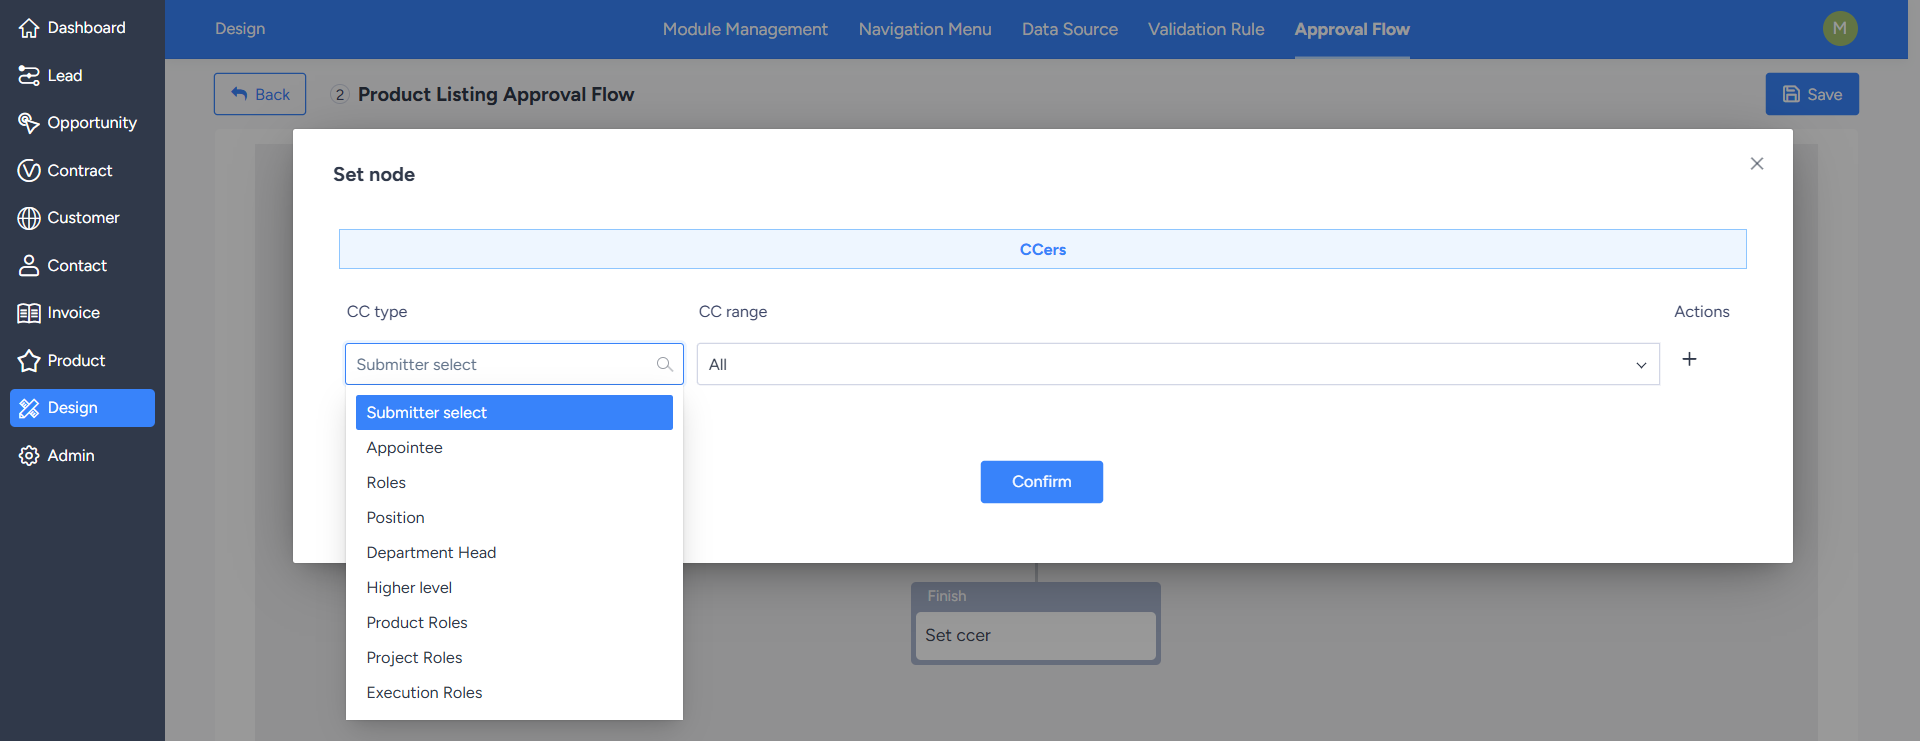
Copy nodes are used to synchronize approval information to relevant personnel. Copy recipients can be set as follows:- Initiator Selected: When initiating an approval, the initiator manually selects the copy recipients.
- Designated Personnel:Designate one or more users as recipients.
- Role: Select the approval role maintained in the "Approval - Roles" list.
- Immediate Supervisor: Select the initiator's immediate supervisor, typically from the system's organizational or departmental structure configuration.
2.2 Approval Node Configuration
Approval nodes are used to set who approves the current node, how it is approved, and the operational permissions during the approval process.1. Setting Basic Information
In the basic information, you need to maintain the title and approval node type of the approval node.- Title:The name of the current approval node.
- Approval Node Type:Used to control the approval method for this node.
- Manual Approval:Requires the approver to manually click "Approve" or "Reject."
- Automatic Approval:The system automatically approves; commonly used in multi-branch scenarios where no approver is set.
- Automatic Rejection:The system automatically rejects; commonly used in multi-branch scenarios where no approver is set.
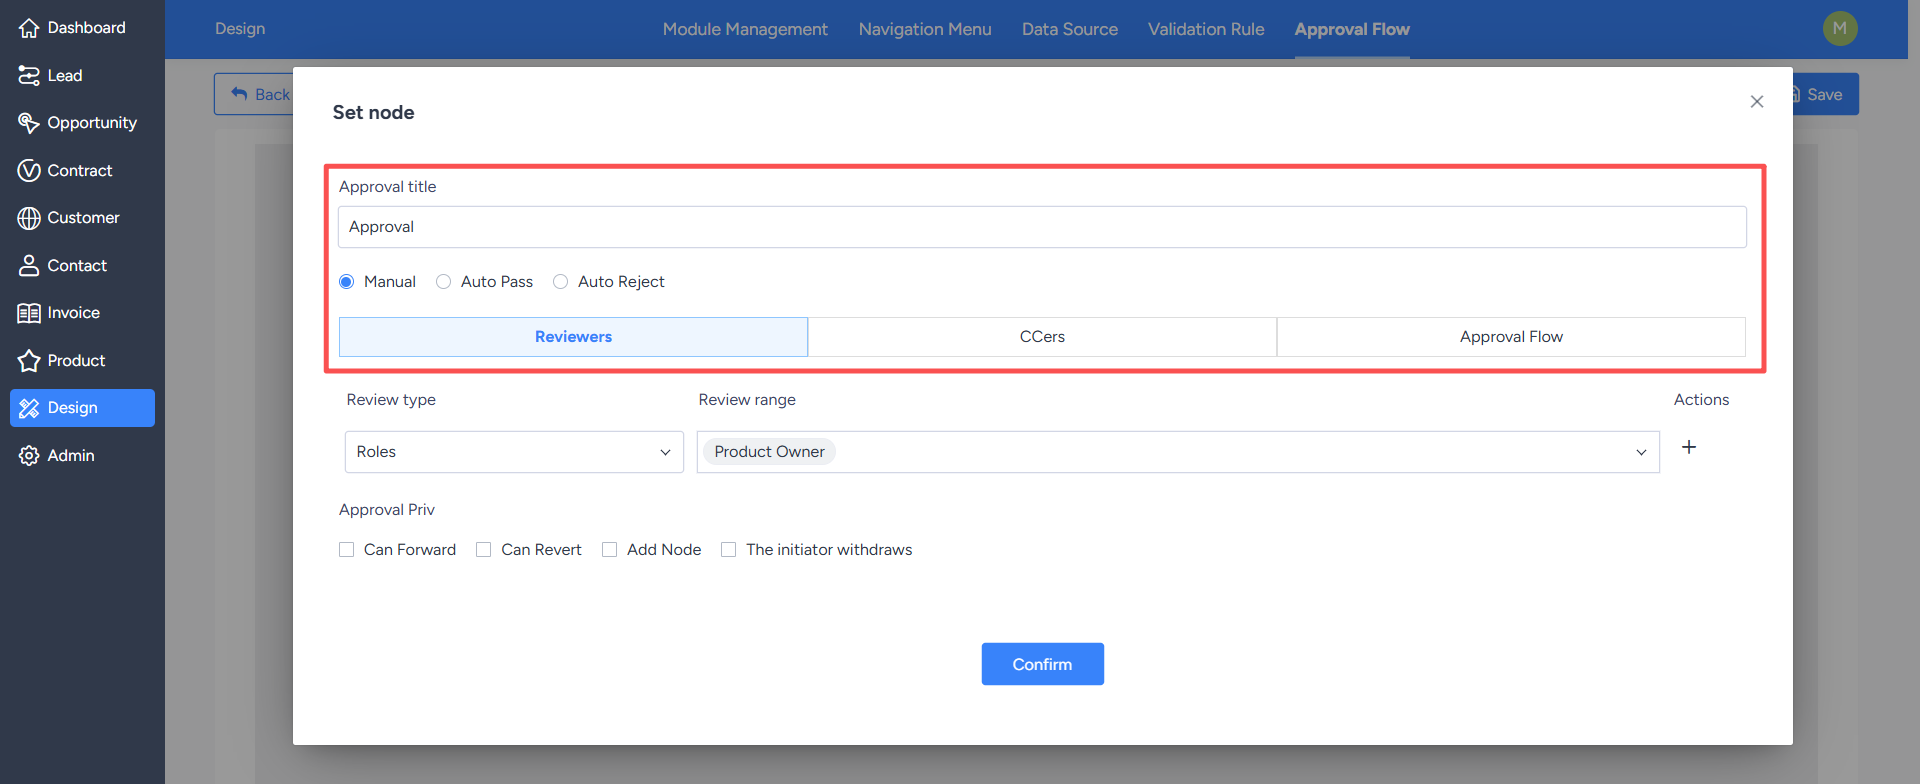
2. Setting Approver
The approver type determines which personnel will approve the current node. Supported approval types:Initiator Selection:The initiator manually selects the approver when initiating an approval process. There can be no restriction on the scope, or restrictions can be set by role, department, or position.
Initiator (Self-Selected):The initiator approves the approval themselves.
Role:Approval is performed by users under that role. Roles can be configured in the backend.
Position:Approval is performed by users under that position. Positions can be configured in the backend.
Department Head:Approval is performed by the head of the initiator's department.
Immediate Supervisor:Approval is performed by the initiator's immediate supervisor. Immediate supervisors can be configured in the personnel information.
Multiple Levels of Supervisors:Approval is performed consecutively by multiple levels of supervisors. The approval endpoint can be the highest supervisor, the second-highest supervisor, the third-highest supervisor, the fourth-highest supervisor, or the fifth-highest supervisor.
Previous Node Approver Selection:The approver at the previous node selects the approver for the current node. This method is not supported for the first approval node.
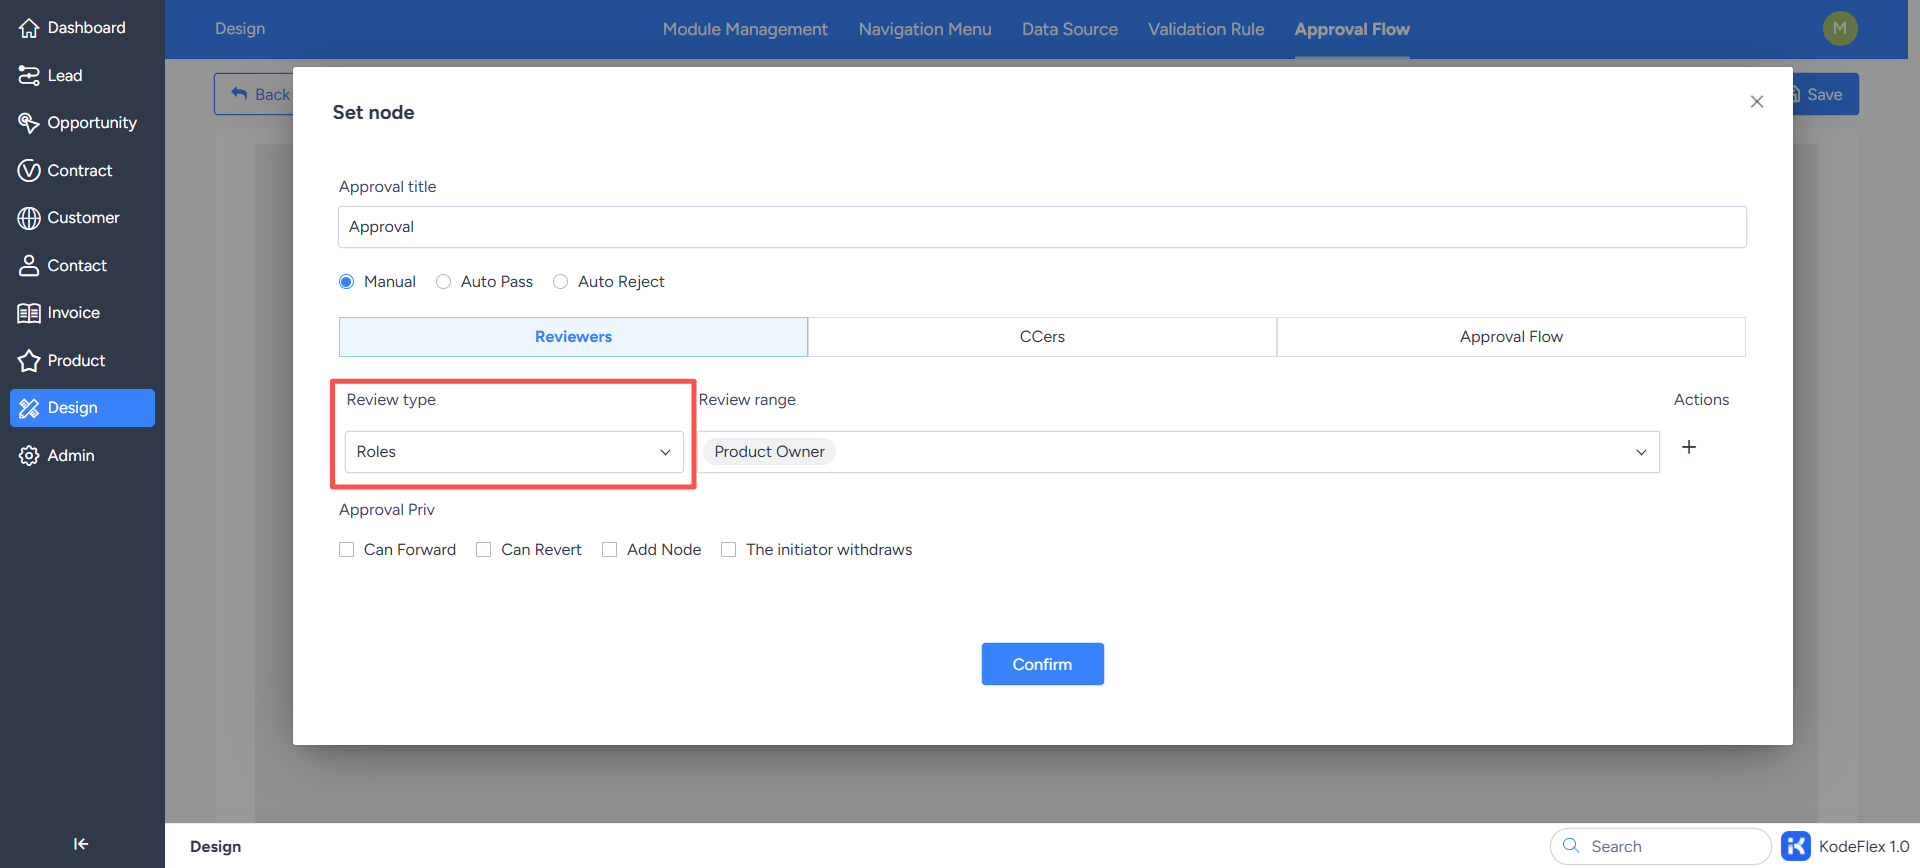
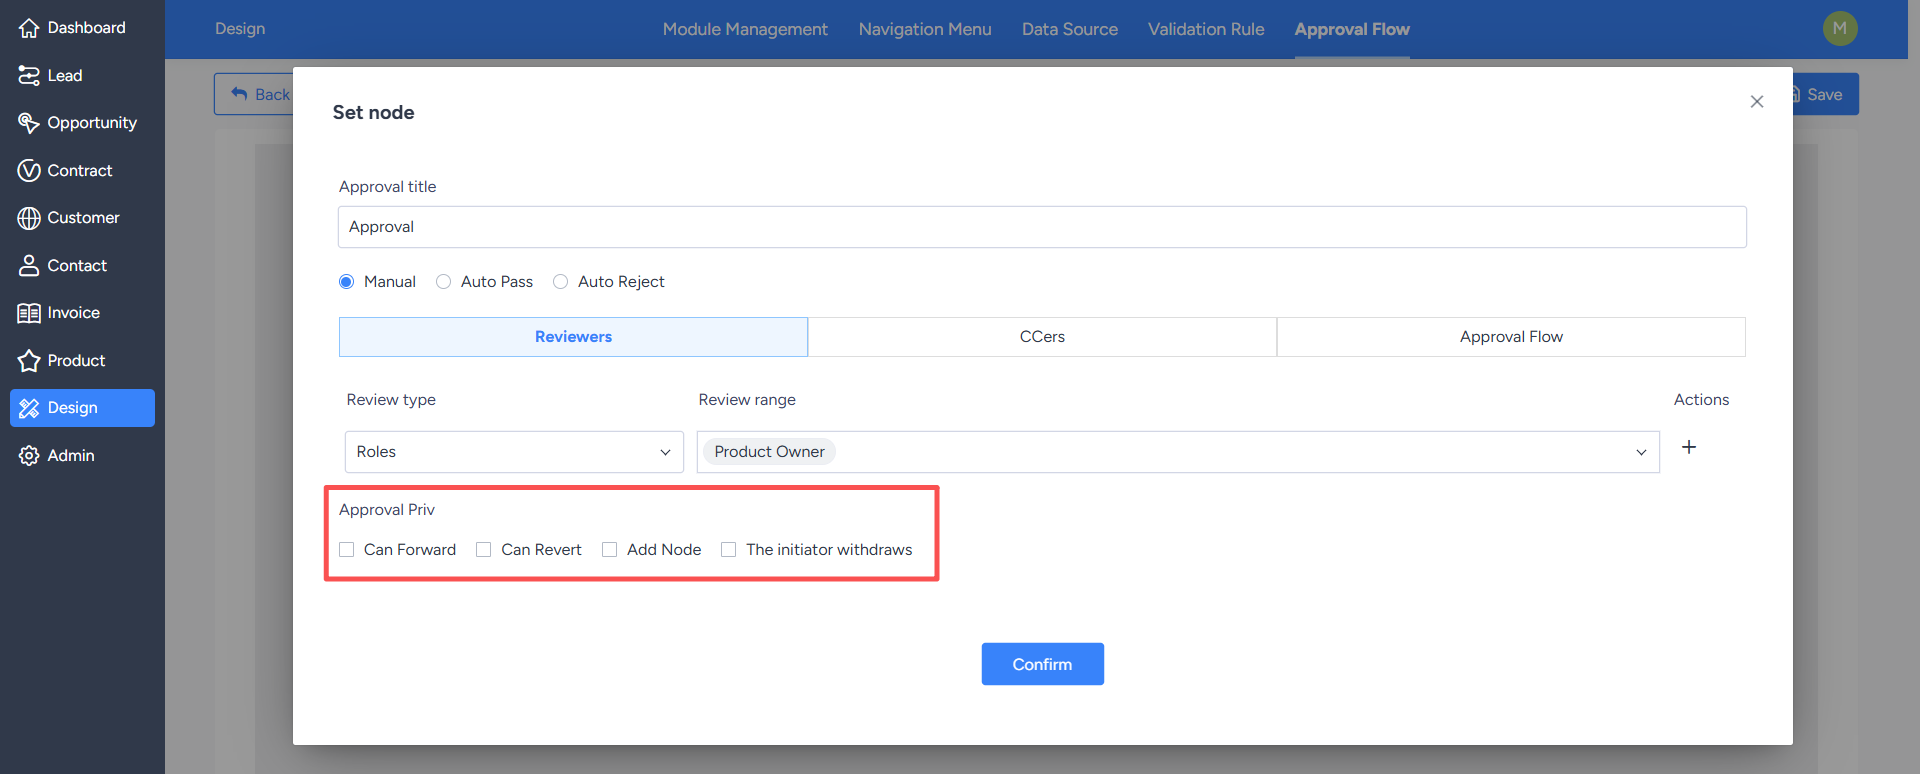
3. Set Approval Operation Permissions
Approval operation permissions control the actions an approver can perform at the current node.- Transfer: The approver can transfer the current approval to someone else for processing.
- Rollback: The approver can roll back the process to any node before the current node, or back to the initiator.
- Approval in the order of the approval process: After the rolledback node is approved, the process continues according to the original approval flow.
- Start directly from the current review node: After the rolledback node is approved, the process returns directly to the current approval node to continue review.
4. Set Copy Recipients
Copy recipients can also be set in the approval node. The selection range for copy recipients is similar to that of approvers, and can be configured by specifying personnel, roles, positions, department heads, direct supervisors, etc.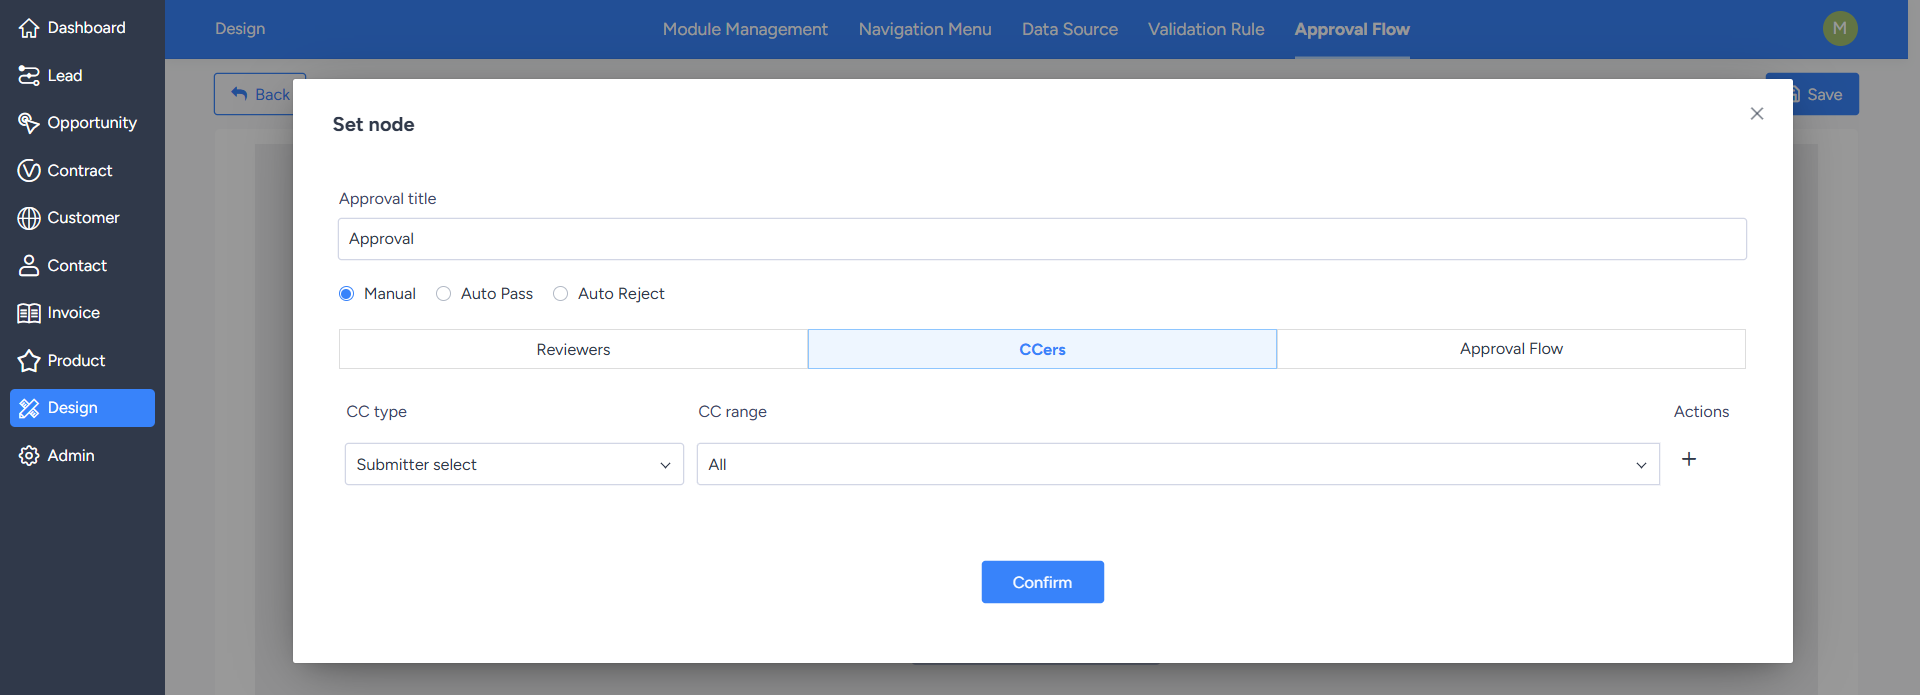
5. Set Approval Process
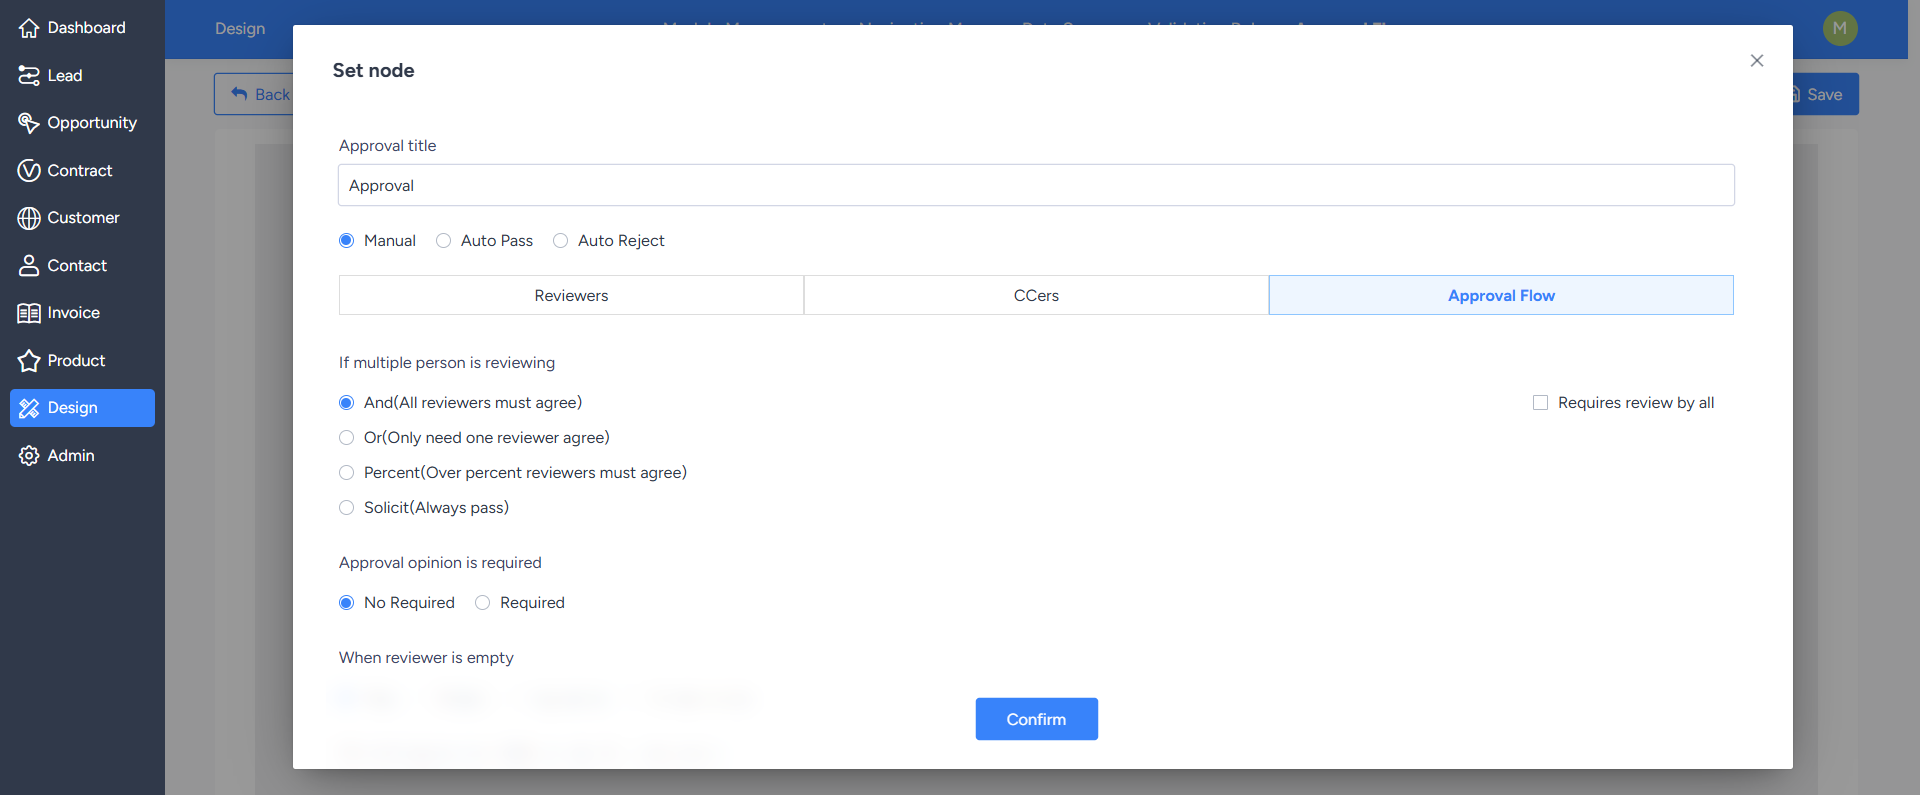
Approval process settings are used to configure rules such as multi-person approval methods and whether approval comments are mandatory.Multi-person approval methods include:
- Joint Sign-off: Approval passes only after all approvers approve.
- Alternative Sign-off: Approval passes only after one approver approves.
- Joint Sign-off: Approval passes only after a certain percentage of approvers approve.
- Request for Opinions: Approval passes only after a set approval percentage is reached.
- Seeking Opinions: Approval is granted.This method is primarily used to collect opinions; the approval result does not affect the flow of the process.
2.3 Adding Nodes and Branches
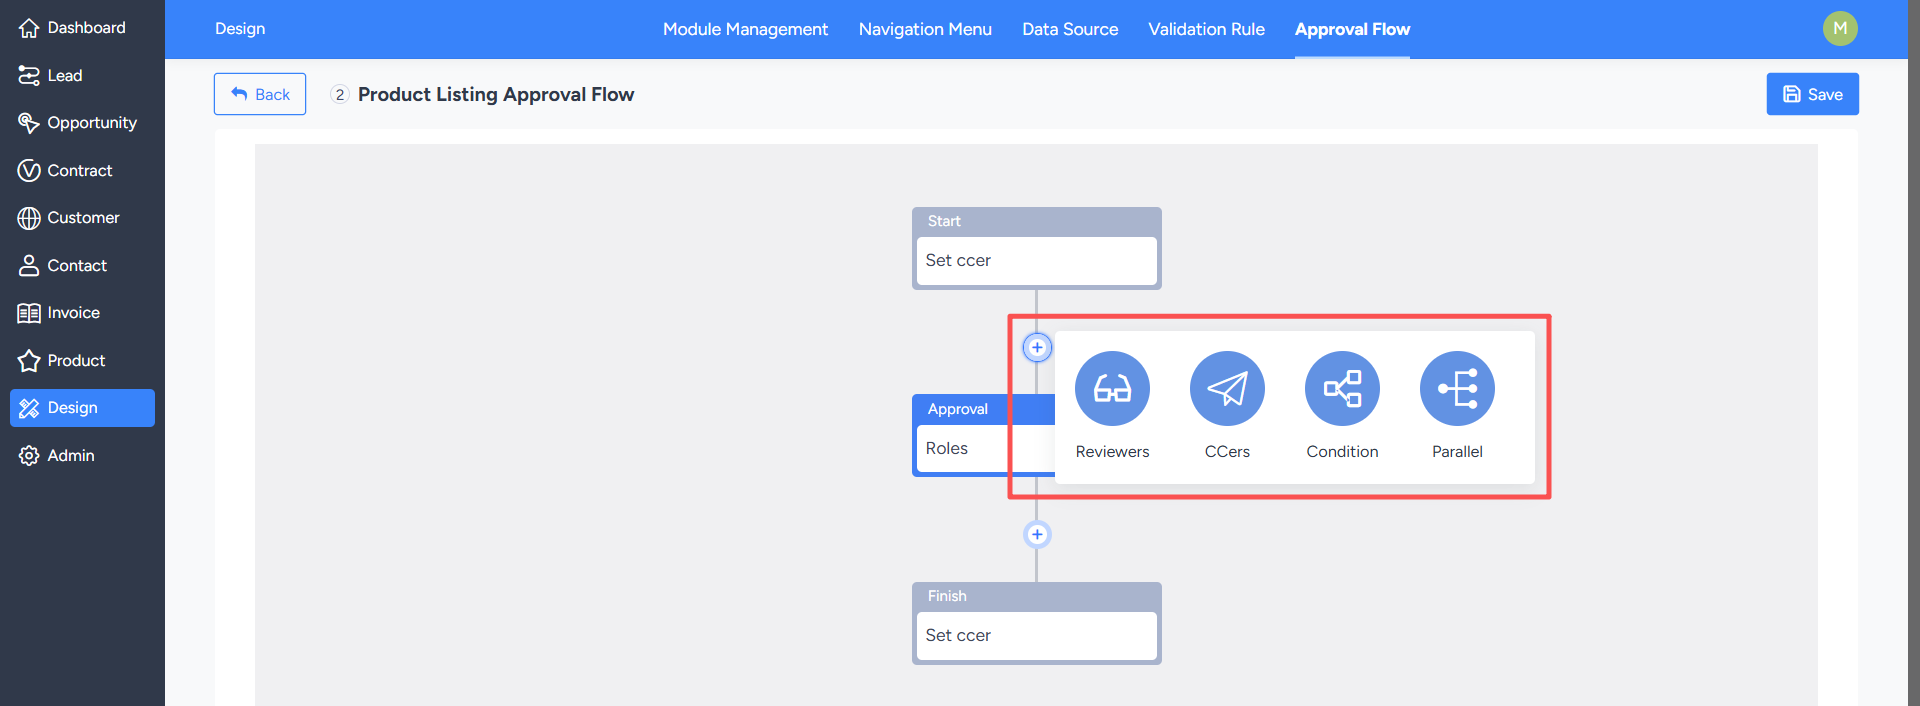
On the approval process design page, you can click the plus icon between nodes to add approval nodes or branches.Branch types include:
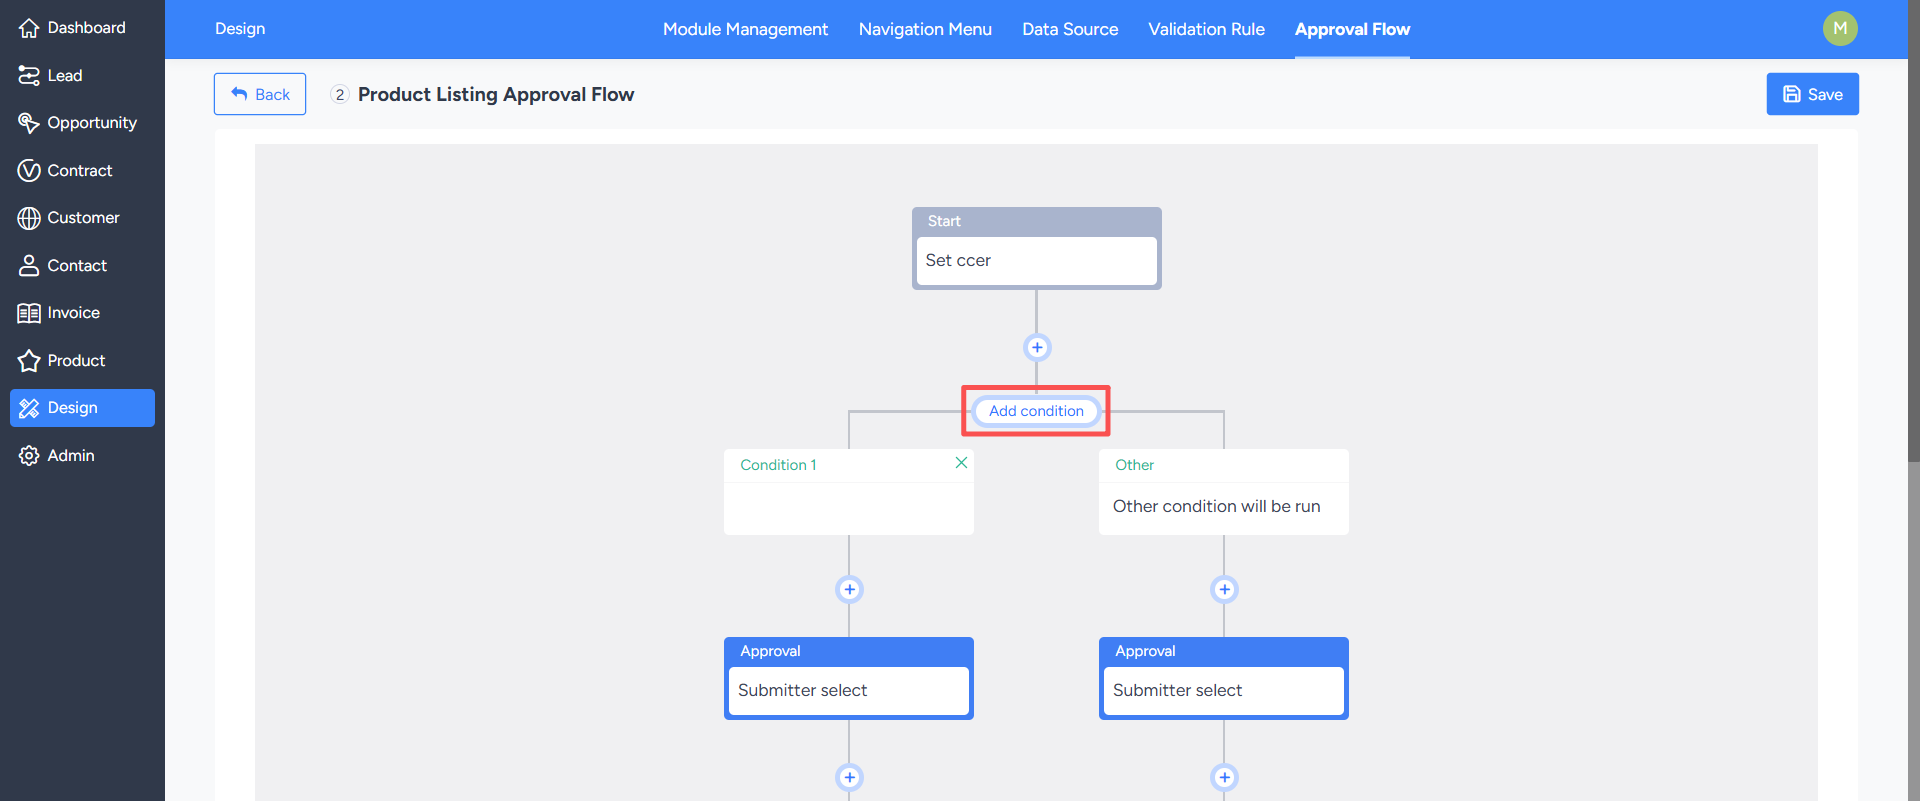
- Conditional Branch:Select one branch to flow downwards based on conditions. Condition priority is judged from left to right. If none of the branches on the left are met, the rightmost default branch is entered.
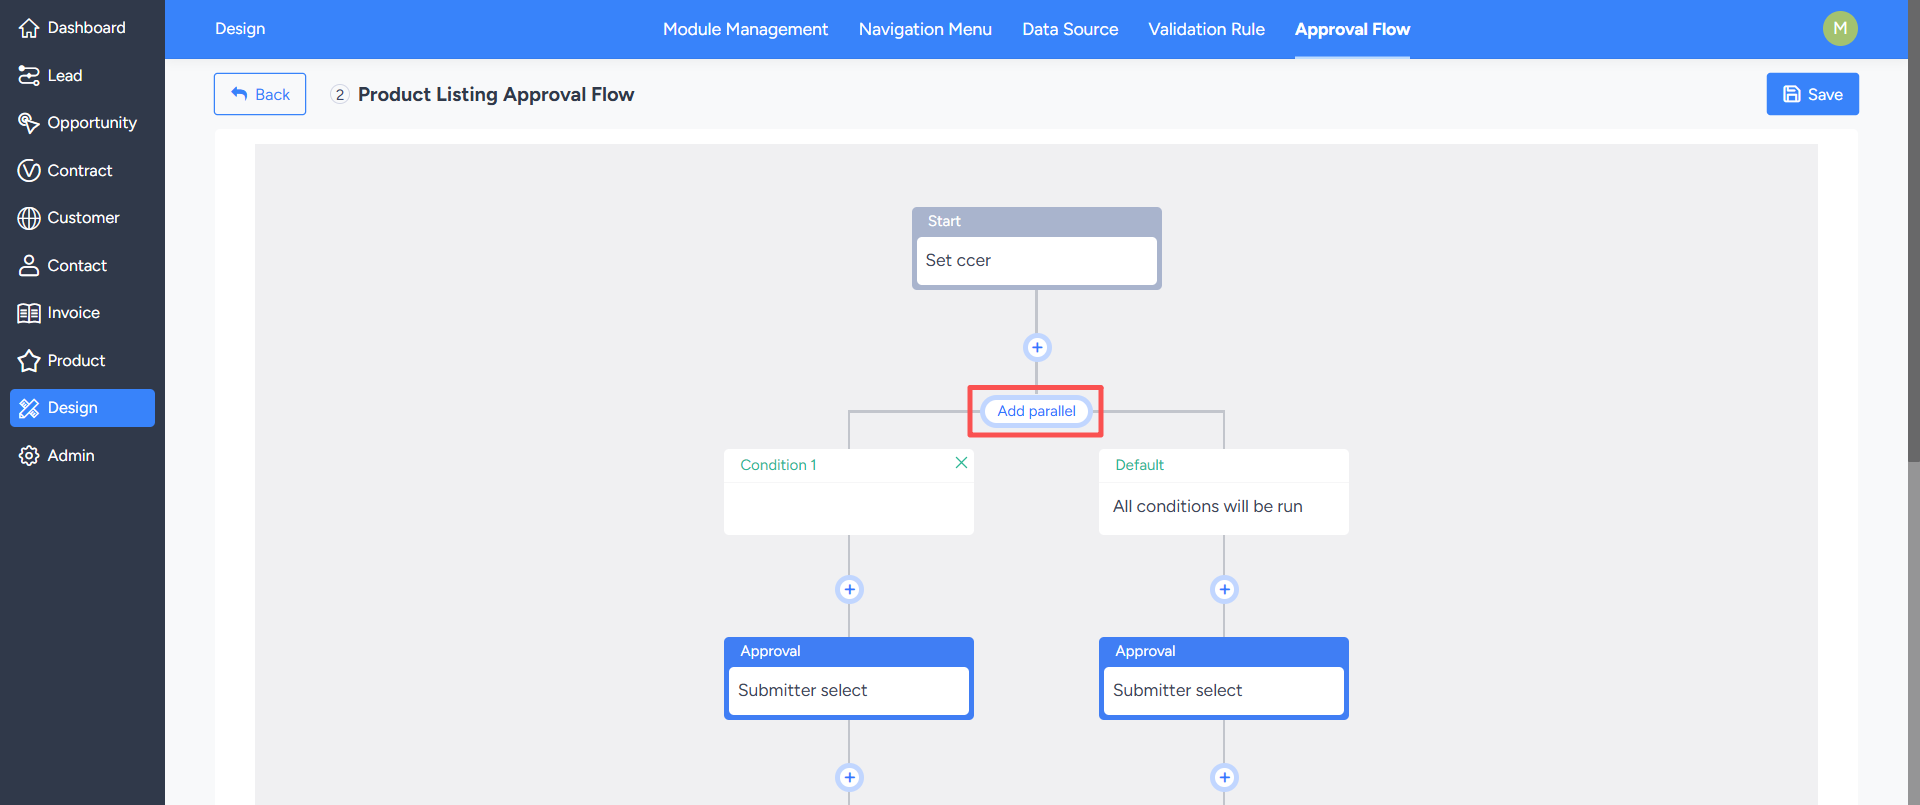
- Parallel Branch:Supports multiple branches flowing simultaneously. If the conditions are met, the system will proceed to the corresponding branch; the default branch will always be executed.
3. Using Approval Workflows in Modules
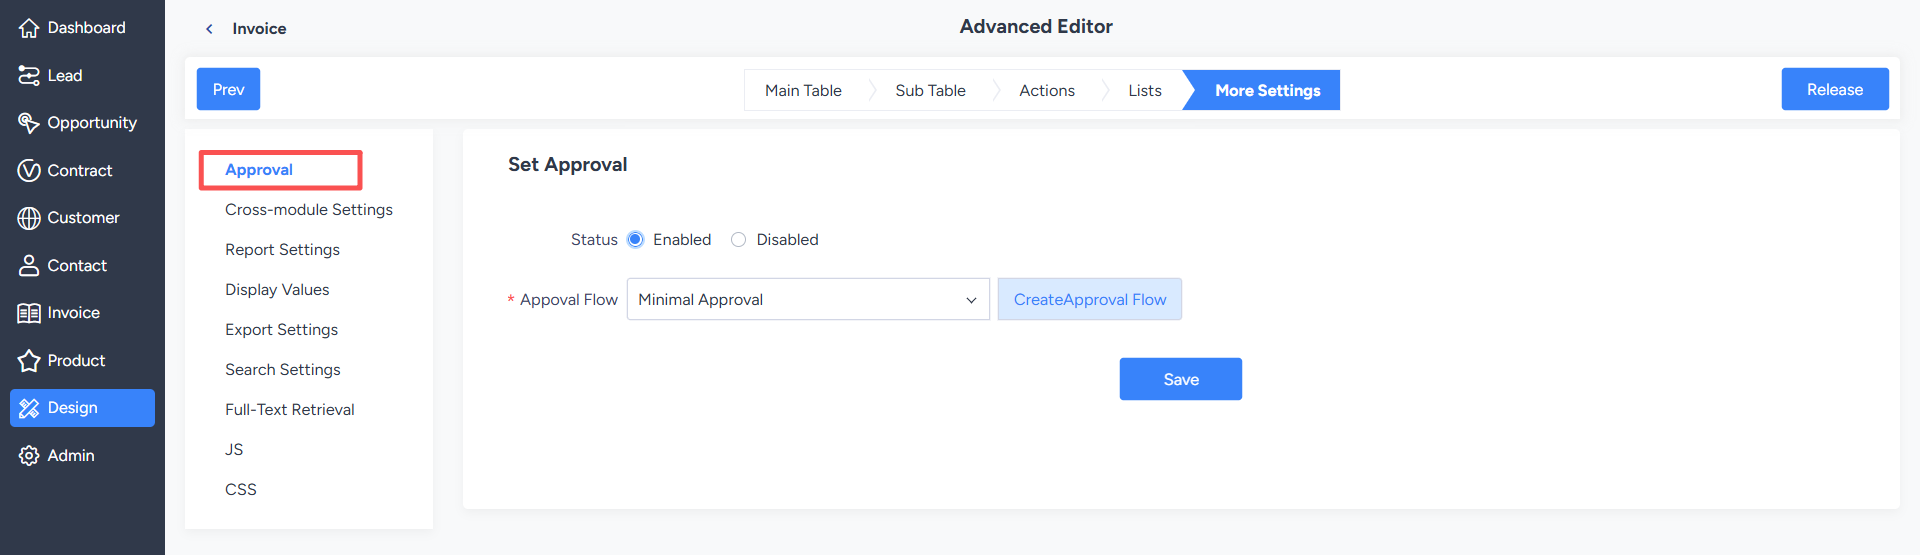
After selecting this approval workflow in the module's "More Settings," when a user submits data, the system will execute the approval process according to the configured approval nodes, approvers, and workflow rules.